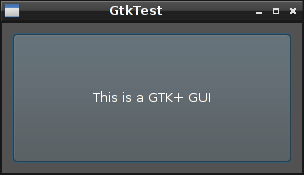
I'm always in for some cross platform dev-ing so here goes how to do a Gtkmm window in C++ on windows. Its a little frustrating to set up,so I'd seriously advise Linux as a platform for learning to develop programs.
Cross compile using MinGW. Ill do a little tut on that sooner or later so you get the flavour of how that is.
On with the windows.You'll need to download some programs:
* The GTKMM windows (-development version)
* MinGW compiler & utils set.
* MSYS shell.
So install the Gtkmm, then MinGW, then MSYS, leave the default values everywhere.. thats what I done and its working for me.. :-)
Now to set up the "enviroment". This is sometimes automatically done, (depending on versions of installers etc, so you can skip this step if you want, I'd advise checking these settings regardless though!).
* You need to check your PATH variable. This is where windows will look programs when you run them from the command line. And that's how were going to be compiling our programs. So we need to make sure that the MinGW tools are on the PATH. Here is a simple tutorial for Windows 2000/ XP. Vista will be similar.
* Try it out. Click Start->Run (or hit
When you installed MSYS, it should have placed an icon on your desktop. Double-Click it, and then it will take you to a "magic" command prompt. It does the same, but you have extra features over the standard windows one. Were going to use these extras when compiling our program.
I hope you have a little experience with g++ & its command line arguments like -I , and -L. When we write a program, we use functions for a library (Gtkmm) so when we compile the program, we need to tell the compiler where to find the libraries that contain these functions. Fair enough. So how do we do it?
In MSYS enter: (copy it from here, go to MSYS, hit
g++ main.cpp -otest -I"someIncludeDirHere" -l"someLibName" -l"nextLibName" -l"anotherLib"
That's the long-winded way. Ie: We need to specify each library that were going to use. If we use Gtkmm,
we depend on Gtkmm, gdkmm,cairo,glib,gobject etc etc.. So its not practical to define each library ourself.
Again in MSYS:
g++ main.cpp -otest -I"someIncludeDirHere" `pkg-config gtkmm-2.4 --cflags --libs`
See what we did there? the ` ` symbos (backquotes) are used to "run a command inside a command". Go to a normal windows prompt. Right Click to paste this command into it. It gives back some "no such directory" errors. Hence why we use MSYS, which knows how to handle the backQuotes.
How does pkg-config work? Out of the scope of this tutorial, but lets just go with what we know, it adds all the -l"libraryName" stuff to the command.
Thats it: ;-) We should now be able to use the other tutorial examples in windows.
Lets do it! In this .zip file, there's 2 files: main.cpp and GtkTut2.exe.
WARNING! DOWNLOADING & RUNNING .EXE FILES FROM UNKNOWN SOURCES CAN BE DANGEROUS FOR YOUR PC'S HEALTH. I TAKE NO RESPONSIBILITY FOR ANYTHING. HAVING SAID THAT, I COMPILED THE MAIN.CPP FILE, AND I FEEL ITS SAFE TO RUN.
So I decided to include a .exe of the program, for people who do want to check it out. RUNINNG the program only needs certain parts of Gtkmm, as were only using certain parts. If you've installed the -development version, you'll be fine, double clicking it should display a Gtkmm Window like tutorial number 2.
It will be "decorated" differently, ie Windows buttons will be used, which are by default white.
It is possible to change Windows look and feel, but that's for another Tutorial.
To compile this example, save the zip file (same one as linked above) to a directory of your choice. I'm going to save it to the Desktop for this example.
Now go to your MSYS, "cd" into your desktop:
cd "C:\Documents and Settings\
and then try the following command:
g++ main.cpp -oMyCompiledGtkmmWindow `pkg-config gtkmm-2.4 --cflags --libs`
Please! COPY PASTE THE COMMAND. there are ` ` symbols, backQuotes, and they NEED to be there. If you can't see them properly (they're pretty small on my screen), try using a Monospaced font. yes its ugly, but you see everything. That's wat counts for command lines.
If you managed to compile this, drop me a comment, I'm pretty sure I coverd each step, but I'd like some reassurance! Cheers, -Harry


.png)
.png)
